
This is a simple, down-to-earth article about how to get comfortable with 9:16 vertical video and not lose the meaning within the frame. No fluff or complicated formulas: what to check before shooting, where to put text, how to maintain quality and sound. I’m sharing what I’ve noticed myself and what has worked for my friends.
The Short Answer
Shoot in 9:16, keep the main subject in the central third of the frame, make text large and not at the edges. Use even lighting, clean audio, and make the first 2 seconds clear. Before publishing, open the preview in TikTok, check the cover, subtitles, and ensure the interface isn’t covering anything.
How to Work with the Vertical Format on TikTok
What “Vertical” Means in Simple Terms
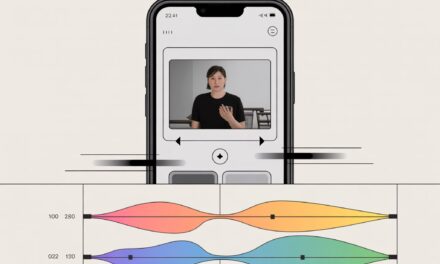
9:16 vertical video shows life to fit a phone screen, the way we naturally hold our smartphones. The less a viewer has to tilt their head or squint at tiny text, the better. I’ve noticed that when the main idea is in the center and in close-up, retention grows even without complex effects.
Where Views Are Most Often Lost
Many people run into issues where captions and stickers are covered by the interface, or quality drops during upload. Another typical mistake is forgetting about the first few seconds—those are exactly what grabs attention. In my opinion, it’s better to plan the first shot and one clear thesis in advance than to rely on editing tricks.
Which Video Parameters Really Matter on TikTok?
Frame Size and 9:16 Aspect Ratio
It usually works like this: 1080×1920 and 9:16 without black bars. If you shoot in 4K, the final result is still shown vertically, so make sure important elements don’t go beyond the future frame’s borders.
Frame Rate and Stabilization
60 fps makes motion smoother; 30 fps is also fine if the lighting isn’t ideal. If you’re walking and shooting, turn on stabilization on your phone or get an inexpensive tripod—a tripod is better than a shaky hand.
Light and Color Made Simple
Even light on the face and a neutral background help the camera avoid “noise.” I often just turn towards a window and turn off a bright backlight source—the picture immediately becomes calmer.
Sound and Subtitles
A clear voice is more important than any edit. A lavalier mic solves the issue, but you can even record well on a built-in microphone if you speak closely and eliminate wind noise. Subtitles take on part of the understanding when a person watches without sound.
Why Video Quality Drops
What Happens During Upload
The platform compresses the file so it loads faster in the feed. If the original is dark, noisy, and has tiny text, everything becomes worse after compression. 9:16 vertical video with a close-up and even lighting handles compression more easily.
How to Avoid Unpleasant Surprises
Shoot in good light, avoid excessive filters, don’t forward the clip dozens of times through messaging apps. It’s better to upload directly from the editor at 1080p. I’ve noticed that simple, clear shots look more expensive than ones overloaded with effects.
A Friend’s Story
A friend had constantly blurry thumbnails. It turned out he was taking a freeze frame from the middle of the video where there was motion. He switched to a separate static frame with text and normal lighting—the blurriness disappeared.
How Not to Let Text Get Covered by the Interface
Safe Zones in Simple Terms
On TikTok, there’s an action column on the right, a caption and music at the bottom, and a few UI elements at the top. Therefore, keep titles and important objects in the central third of the screen and make margins of at least 10-12% from the edges. This isn’t a strict rule, but it usually helps.
Where to Place Titles and Subtitles
The title is better slightly above center; subtitles should be closer to the middle, not right at the very bottom. If you have a list, place it center-left to avoid running into the likes column on the right.
A Mini-Story From Me
Once, part of my explanation went under the comments button. I moved the text to center-left, increased the font size—and people stopped asking about what was already written.
What’s Where on Screen: A Cheat Sheet
9:16 vertical video is easier when we understand in advance which interface elements might get in the way. Below is a simple reference table. It’s approximate because the interface updates, but the logic remains.
| Interface Element | Where It Usually Is On Screen | What to Consider |
|---|---|---|
| Likes, Comments, Shares Column | Right side, centered vertically | Don’t put lists, prices, or key captions there |
| Username, Caption, and Sound | Bottom left part | Text at the very bottom can easily be covered by the caption |
| Follow Button | To the right of the username or near the avatar | Don’t place important buttons/arrows in your video over this area |
| Progress Bar | Along the bottom width | Small subtitles at the bottom can blend with the progress bar |
| Stickers, Effects | Depends on the template | Leave extra space if you plan to add effects in the editor |
When to Shoot Vertically and When to Adapt Horizontal Footage
If You’re Shooting from Scratch
It’s better to shoot vertically right away to avoid cropping later. Close-ups, faces, and hands work well. Shoot movements so the subject moves vertically, not getting lost in the width.
If You Have Horizontal Footage
You can carefully crop 16:9 to 9:16, keeping the main subject centered. B-roll helps—additional vertical close-up inserts to hide the crops and make edits look natural.
A Minimalist Phone Filming Kit (Without the Headache)
Three Things That Most Often Save the Day
A tripod or holder, a small light, and a simple lavalier mic. With this trio, your videos immediately look and sound more confident. Editing on your phone is also fine if you pay attention to text clarity.
On Editing Without Overload
Short cuts, a clean frame, understandable subtitles. In my opinion, one clear callout and a couple of camera movements are better than a bunch of effects that only distract.
How to Know Everything Uploaded Correctly
Preview and Thumbnail
In the preview, check if a corner of the frame got “eaten” or if a title is covered. The thumbnail should be readable in miniature and without tiny details.
Subtitles and Sound
Check auto-generated subtitles and fix typos. Level the volume so the voice isn’t lost behind the music. If in doubt, listen at low volume and with headphones.
Useful Links
For reference, you can check the official materials: TikTok Help Center: Upload HD videos, TikTok Creator Academy.
Pre-Publish Checklist
- [ ] 9:16 aspect ratio, minimum 1080×1920
- [ ] First 2 seconds are hooking and understandable without sound
- [ ] Text is large, in the central zone, not at the edges
- [ ] Even lighting, face not in shadow
- [ ] Clean audio, music doesn’t overpower the voice
- [ ] Subtitles are enabled and proofread
- [ ] Thumbnail is readable in miniature
- [ ] In preview, nothing is covered by the interface
- [ ] Hashtags are relevant, not an endless list
- [ ] Link, if present, is clickable and appropriate
Micro-FAQ
Can you upload 4K vertically? You can, but 1080×1920 is sufficient. The main things are lighting and composition.
Why did the text become blurry? Most likely the font is too small or the background is dark. Increase the size and add contrast.
Where is it better to put hashtags? In the caption, 2-4 relevant ones. The rest is just noise.
Are auto-subtitles enough or should I make my own? Often they are enough, but correct names, terms, and numbers.
Music from the library or your own? In my opinion, the library is better—fewer copyright questions and it sounds more stable.
Key Takeaways from the Article
The vertical format is about simplicity: 9:16, center frame, large text, clean audio, and checking the preview. Most problems are solved during shooting with lighting and composition. If in doubt, keep the focus on one thesis and see if the video is easy to understand without sound.
If you want, share how it went for you. What composition adjustments gave you the best results?
Short Glossary
9:16 – the vertical aspect ratio of a phone screen.
Crop – cutting a frame to fit the desired format.
Safe Area – the zone where the interface doesn’t cover text and objects.
FPS – frames per second, affects motion smoothness.
Bitrate – the data density of a video, affects detail.
Thumbnail – a static preview frame of the video.
Subtitles – text transcription of speech.
B-roll – supplementary footage for edits and context.
Lavalier Mic – a small microphone that clips onto clothing.
Stabilization – a system that reduces shakiness in video.

